Tool: Process Mapping
Usage: Visualising and understanding what happens in a process (for service/process redesign)
Process mapping involves developing a simple visual picture or map of a process. It is a relatively simple tool that can help the team understand how the various parts of a process fit together, and improve its overall functioning.
When to Use:
A relevant example is the ‘patient journey’ through the health care system. It can be a challenge to understand what happens to a patient through their whole journey. There may be several clinicians, from different departments or organisations, dealing with different aspects of a patient’s care. Similarly, with administration, a number of departments and individuals may be involved and it is unlikely that an individual will have a thorough knowledge of what happens in each stage of the overall process.
Process mapping provides an opportunity for those working across different departments and organisations to come together to develop a complete and shared understanding of a process.
By working as a group to draw a map of the existing process, the team can see how the various parts fit together. The map may also highlight areas for improvement, such as duplication and gaps in the existing process.
There are many benefits to process mapping, including:
- Seeing the process through the end user’s (e.g. patient’s) perspective. This is particularly important as it may be the first time that the whole team realises how complicated the process is for the user. For this benefit to be attained, it is encouraged that the team involve the end user in the development of the map.
- Understanding what is actually happening, rather than what the team thought was happening.
- Providing an opportunity for the team to develop a shared understanding of the process. This may include clarifying current tasks and responsibilities and how resources are being used.
- Highlighting inefficiencies or gaps in the process and promoting discussion about how to improve these areas. By including the various individuals involved in the process, the team is more likely to have shared ownership of the solutions.
Getting Started
As a team, begin by mapping out the current process as it actually happens to ensure everyone has a full understanding of the process.
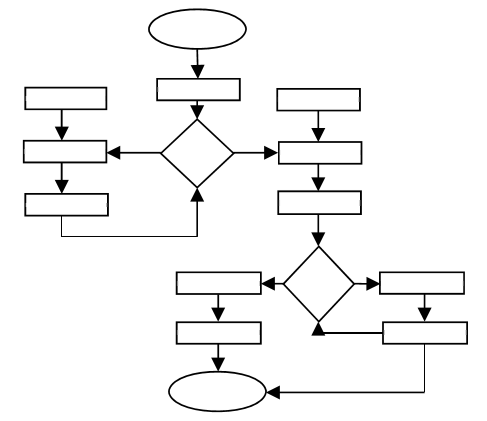
The following diagram illustrates what teams often think happens in a system:
Generally, this tends to be a little different to what actually happens in real life:
And what could happen in an ideal system:
How to Use Process Mapping
- Decide on the process to be mapped. This is often the most difficult decision to make. It is suggested that you start with a process that is a priority for the team. Once the process has been decided, the aim of the mapping process needs to be determined.
- Define the scope of the process. This involves ensuring that the process is 2. not too large or too small. Do this by establishing boundaries for the process, which means setting a clear starting point and a defined end point. These boundaries are often determined by the aim of the project.
- Select the team who will help create the process map. Generally, a balance is required between keeping the group size to a manageable number and having appropriate representation from key stakeholders. When choosing participants, it is critical to involve managers who are actively involved, as well as staff who work in the process.
- Map the current process. This involves mapping the process as it actually occurs. It may be surprising how this differs to what the team thinks is happening or should be happening. It is important that this process does not involve blame and remains objective.
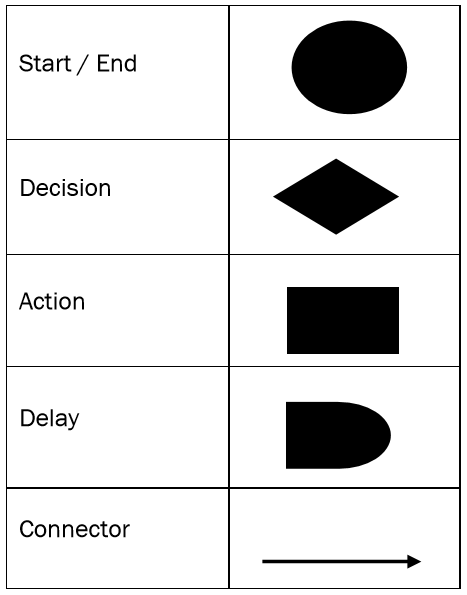
- Make sure the map is the simplest possible picture of how the process works. A series of symbols can be used to enhance the process map but this is not essential – different colour ‘post-it’ notes could be used as an alternative.
As a group analyse the process map to identify gaps, bottlenecks and any unnecessary actions being performed, possibly by the wrong people.
When analysing a process, for each step ask:
- Can it be eliminated?
- Can it be done in some other way, in a different order, or in parallel to another task?
- Is it better done somewhere else, or by someone else?
The group may also want to think about how these areas for improvement can be addressed. What can we do differently?
Write down the ideas for change that arise and rank them in order of priority. These ideas can be tested using the Model for Improvement.
Tips
- The most valuable part of process mapping is the questions and observations that occur during and after the mapping process. Observations may include data such as time, volume or sources of inefficiency, such as bottlenecks and duplication.
- Keep the map simple and focus on the process. Although more complex process maps can be produced using a series of symbols to enhance the map, these are not essential and should not be the focus of the group.
- Be careful not to map everything - stick to the process that has been chosen for improvement.
- Focus on mapping what actually happens in the current process, not how the group would like it to happen.
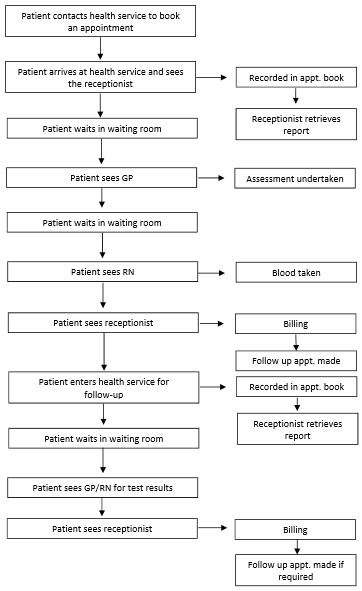
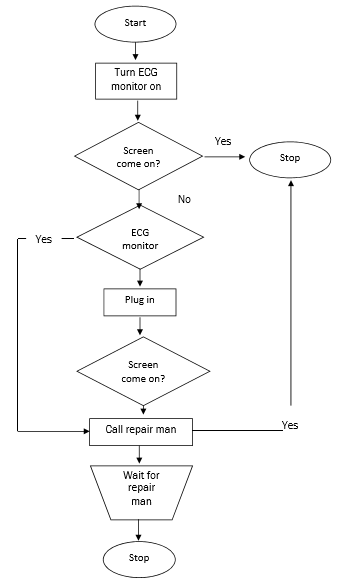
Below are two examples of simple process maps. The first looks at the process of a patient visit to a health service, and the second looks at how a practice checks their ECG machine.
Example 1 – A patient’s visit to a health service
Example 2 7 – The process used by a practice to check the ECG machine
7 Example taken from the Quality Improvement Toolkit, National Primary Development Team (UK), 2008


